
This past couple of weeks I have hosted a self massage workshop on how to increase your flexibility with Self Myofascial Release Techniques. I labeled it ‘Flexibility with Foam Rolling’ or ‘Roll Your Way to Flexibility’ for a bit sexier name options than self massage for less aches and pains or something like that. Sure, people want to feel less achy, but give your workshop a bland name and no one signs up, no matter how much they need it.
As I was writing up the notes with information and research I have studied and as I started outlining the important points that I wanted to make during the workshop, I realized that a blog post was being born. So if you didn’t attend these last 2 workshops then here’s some of the highlights that hopefully will help you feel less stiff and overall more mobile and increase your flexibility.
Let me start with some definitions for clarity.
Mobility & Flexibility, most of us use these terms interchangeably, but they are not the same. Mobility refers to how your joint moves, while flexibility refers to the length of your muscle. Improving both your mobility in a joint and improving the flexibility of your muscles around your joints can have an effect on each other and thus your range of motion (or ROM), but they are not the same.
There are other things to consider, such as if you have limited ROM in your joint because of the bones of that joint, than even super flexible muscles aren’t going to increase that particular joint. For an example, lets stay you find it hard to do a seated straddle. This could be of course muscle tightness, but this could be the location of where your hip socket is located on your pelvis or the length of the femoral neck and head of the femur that fits into the hip socket or both. If you have have done a lot of dedicated work on your flexibility and have seen some improvement but still don’t have a pancake straddle split, than it could be your structural make up, but only an X-ray would tell you that.
Fascia, it’s Everywhere! It’s connective tissue made of collagen & elastin fibers, examples: tendons, muscles, ligaments, hair, fingernails, skin, etc. It’s found between, around & throughout skin, muscles, blood vessels, nerves, everything! Fascia also blends muscles, tendons and ligaments together. There is no beginning and no end to fascia. It allows us a wide range of movement. It’s flexible and is a force transmitter and it fulfills many structural and chemical functions in the human body.
When the fascia is healthy and hydrated it allows for freedom of movement of our bodies into the many shapes and positions. When fascia becomes dysfunctional for some reason, for example: trauma, extended time in certain postures, dehydration or stress, then it becomes tacked down, stuck and/or stiff and can restrict our movement, misalign joints and/or cause pain.
Now that I have some of the important definitions out of the way for this blog post, lets move into ways to perform Self Myofascial Release Techniques and what are the benefits.
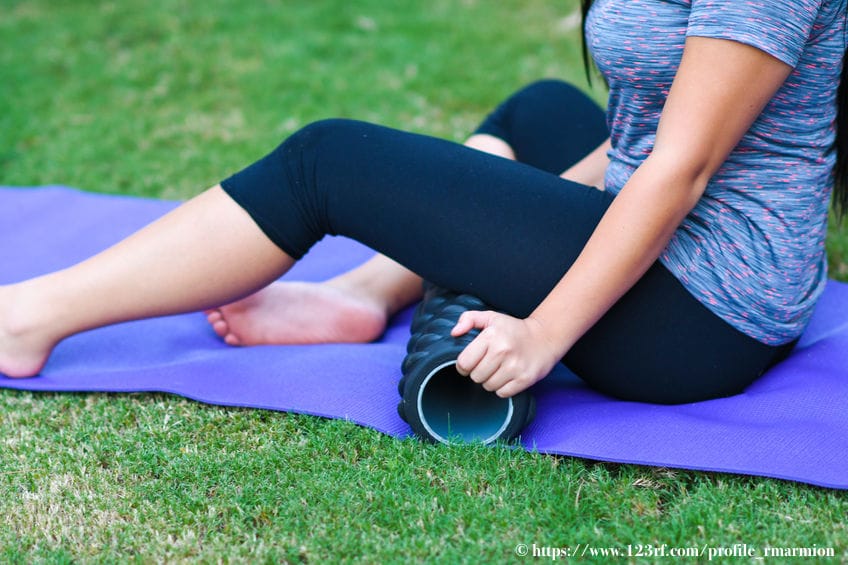
The Act of Rolling
When we are rolling our muscles we are also rolling our blood vessels, nerves and the fascia of our body. Rolling over blood vessels helps to circulate oxygenated blood throughout your muscles-this is why foam rolling is great as part of a pre-exercises warm up. We’re also promoting the sponge like quality of our facia to absorb and rehydrate the areas being rolled, especially if we drank some water before rolling-it’s a good idea, give it a go. Lastly we’re stimulating the nerves and the mind-muscles connection through those nerves.
There are many benefits Self Myofascial Release Techniques (SMFR).
What we know for sure through research is that myofascial release techniques:
- Help reduce neuromuscular tension (or neural tension)
- Move blood and other fluid (like water) throughout the body
There are claims that myofascial release can help with these items below:
- Corrects muscle imbalances
- Relieves muscle soreness.
- Improves joint range of motion
- Reduces joint stress
- Maintains normal functional muscular length
- Improves blood flow and neuromuscular efficiency
- Increases the pliability of musculotendinous junction (where the muscle and tendon meet)
Do’s
- Move slowly over the area being rolled, about 1 inch per second. This gives your brain and fascia time to communicate and relax the tight areas. Going slowly also helps you really identify Your tender spots.
- Drink at least 6-8 oz of water before and after you use SMFR techniques. This helps bring the water in to hydrate your fascia and also to flush out any toxins released from your muscles and fascia.
- Breath through the rolling process, especially when you find an uncomfortable spot.
- Apply moderate pressure as you roll, this can be done by holding some of your weight off the rolling tool. REMEMBER: Fascia is designed to transmit force throughout the body, so if you apply too much pressure (i.e. force) your muscles will tense up to push back, thus negating the reason you are rolling that area. So moderate pressure, it’s not a pain tolerance test.
- If you find a tender spot (not an excruciating spot) and if you do decide to hang out there, only do so for 20 seconds and really relax your body into that tender spot. (and remember to breath deeply)
- Rest the areas you have rolled for 24-48 hours before you focus on those same areas again. It’s kind of like strength training-the muscles and fascia in that area need some time to process and make changes.
Don’ts
- Roll areas that are painful. Try rolling areas close to where the painful spot is-generally the surrounding areas are part of the reason the painful spot is so jacked up. When rolling there will be spots with more sensation, but rolling should be a “its hurts good” feeling.
- Roll over over joints or bones. Stick only to the muscles.
- Roll your neck or low back. I’m putting this under a don’t because these are very sensitive areas and you want to make sure not to make them worse or cause injury. In all the reading I’ve done and classes I have taken, there is mixed thoughts on whether to roll your low back or not and with what tool if you are going to roll there. I am going to suggest to focus on the areas around the low back: your mid and upper back, your upper glute area and even your hip flexors as many of those muscles connect to the spine in your low back region or those muscles cross the low back. Also the neck vertebrae are shaped very differently than your other spinal vertebrae and if not careful you could do dome serious nerve damage or even cause internal bleeding. So, if you are going to roll those areas get some in person professional guidance first.
- Let your form get sloppy. Many body positions while rolling are essentially a plank (front, side, reverse). Be mindful that your abs are engaged, that you’re active in your shoulder girdle, that your neck isn’t flopping out of spinal alignment or some other poor posture.
Tools for Self Myofascial Release
Before we get down on the floor and start using some SMFR techniques, we should touch base on the many tools that you can use to perform this type of body work. This by no means is an extensive list, it is just a few tools that can be used and for the material presented in my workshop and here in this blog, I am only using the first 3 on the list.
(Links below are to Amazon items linked to my affilage account. If you like the items and buy them with this link, it supports us and our business. TYIA)
- Foam rollers: The ones with a textured surface are best. This is because you can use them as a basic roller: rolling your muscles and fascia through your clothes, but you can also use the textured foam rollers on bare skin and the textured surface can grab you skin and help unstick the fascia from the muscles below or help unstick your fascia between muscle layers.
- Tennis or Lacrosse Balls: These are great for your feet, in your upper traps, infraspinatus/teres major area, glutes, calves and even deep muscles like your psoas.
- Peanuts: Not what your thinking, this is when 2 tennis or lacrosse balls are bond together via a in a sock or with tape or fabricated that way. Great for along the spine and I also love them on my calves.
- Elastic/Rubber bands: These are a 2 inch wide rubber/elastic strap that can be used to wrap around portions of your body and then move the area through it’s normal range of motion. Rogue Fitness sells them, they are great for a technique called flossing which helps unstick the fascia and muscles in the area that’s been wrapped in the band.
- Theracane: Is a stick to use for applying pressure to knots. (Theracane is a brand, but there are others too)
- Massage stick: This is a stick made of plastic that has moving parts to roll over your body. Some are smooth and some have spiked pieces.
Let’s Roll!
Now that you know what tools to use for your Self Myofascial Release work and the do’s and don’ts Let’s Roll!! Remember, stick with 20-30 seconds on each body part. I usually count how many passes back and forth I do and shoot for 4-5. Don’t do more than 20-30s or 4-5 passes, more is not better.
**Oh, and remember good form, good shoulder, ab engagement and breathing.
Lower body
- Feet: use a tennis ball on the bottom of your foot. (As an interesting test, test your standing toe touch and then roll each foot for 1 minute. Then retest your standing toe touch and see what happens)
- Calves: you can use a tennis ball, a foam roller or the peanut. With the foam roller feel free to roll one calf at a time or both. With what ever tool you use roll the length of your calf muscles up and down.
- Hamstrings and Hamstring attachment points: Use a foam roller for both of these areas, but you can also use a ball at the Hamstring attachments-this is at your Sitz Bones (or your ischial tuberosity if you want to call them by their actual name). For hamstrings roll the length of the muscles from just below your butt to just above your knee. For your hamstring attachment points you can roll up and down on either side of Sitz Bones.
- Glutes: You can use a foam roller or a tennis ball. Roll your whole glute-this includes the ouster side part of your glute AKA your side butt. Try rolling one of your glutes with the leg straight and then cross it over in a figure 4 stretch and roll toward the outside of your glute, it may feel extra sensitive there especially in the figure 4 stretch position. I know it is for me. Another area to roll is your upper glutes-the musculature along the top of your pelvis bones on your backside. Some of your back muscles attach to your pelvis so this is a great way to relieve some tension in your low back without directly rolling the low back (which if you remember is something that is not advised).
- Shins: the muscles to the side of the shin bone. You can use a massage stick or the foam roller. I prefer the stick, but foam rolling is just as good. Set yourself up with the roller just blow the knee and just to the side of your shin bone–where your muscle is. When foam rolling my shin muscle I prefer to do one at a time, but you can do both. Roll from just below your knee to just above your ankle. You will be holding a weird plank position.
- Quads: The quads can be rolled one leg at a time or both. While I am foam rolling, I like to roll up and down the length of my quad and with my leg in a neutral position (knee and toe pointing towards the floor), then pass a few times with my leg internally rotated at my hip (this turns your feet like your pigeon toed-make sure to rotate the leg from the hip and not the knee or ankle). Then I like to externally rotate my leg from my hip (this turns your feet like your duck footed-make sure to rotate the leg from the hip and not the knee or ankle). These motions help get all areas of your quad muscles.
- Hip Flexors: With a foam roller lie on it at your hip crease, similar to were the airplane seatbelt fits you. Get into a good forearm plank position and then tip your hips at a slight angle to focus on your hip flexors of your right hip and then tip in the other direction to focus on your hip flexors of your left hip. This area is just a few inches of rolling up and down. Start more to the inside and slowly work your way out toward your outer hip, then move back towards the inside.
- Abductors/Inner Thighs: Lie on the floor with the foam roller lengthwise next to you. Place your inner thigh on the roller, just above your knee, and begin foam rolling from near your knee towards your groin area. You may find that it’s more sensitive near your knee or more sensitive near your groin. Roll with leg both straight and bent.
Give these lower body Self Myofascial Release techniques a try and see if they help improve some of your muscles tension. I hope so!
If you have questions feel free to leave them in the comments or contact us.
Here’s to some foam rolling fun! ~Theresa
Pingback: 5 Shoulder Warm-up Exercises You Can Do Before You Circus! – Redefine Strength & Fitness
Pingback: …And Squeeze Your Butt – Reimagym
Pingback: Straddle Splits and a Straddle Pancake. (part 2) - Redefine Strength & Fitness
Pingback: Reimagym
Pingback: 5 Shoulder Warm-up Exercises You Can Do Before You Circus! - Reimagym